What you need:
Visual Basic 5.0 or 6.0
|
|
Q Paint Like QuickBasic
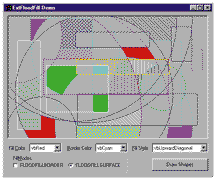
I've written QuickBasic (QB) programs that use the Paint statement to draw maps and fill in areas with colors. I'm upgrading my programs from QuickBasic to Visual Basic 6, and I haven't found a comparable command in VB. I've found commands that fill in a "regularly shaped" area such as a circle, rectangle, or square, but I need to fill in an irregularly shaped area with a specific color. It seems like a step backward to lose such a useful graphical feature with newer software. Is this possible in VB? If not, how can I work around this problem?
A You're right that Microsoft neglected this flood fill capability as it moved its implementation of Basic from DOS to Windows. The rationale was probably that Windows' GDI is so powerful that you shouldn't be limited to the graphics capabilities offered by DOS languages. Of course, accepting that rationale requires setting aside the logical argument that Microsoft didn't apply this same criteria to lines, circles, and so on. Such is history.
About This Column
Ask the VB Pro provides you with free advice on programming obstacles, techniques, and ideas. Read more answers from our crack VB pros on the Web at www.devx.com/gethelp. You can submit your questions, tips, or ideas on the site, or access a comprehensive database of previously answered questions.
|
|
Windows' GDI offers the ExtFloodFill function, which you can use to emulate QB's Paint statement (see Resources). It's an external routine, so first you must declare it within your project to use it:
Private Declare Function ExtFloodFill Lib _
   "gdi32" (ByVal hDC As Long, ByVal X As _
   Long, ByVal Y As Long, ByVal crColor As _
   Long, ByVal wFillType As Long) As Long
The first parameter, hDC, is a handle to the device context you want to paint on. Most often, this is simply the value the object—either a PictureBox control or your form itself—returns through its hDC property. The second and third parameters, X and Y, are the coordinates where the flood fill should commence. As with nearly all GDI functions, you must use pixel coordinates rather than any custom ScaleMode you might have in effect. The last parameter, wFillType, indicates whether the fourth parameter, crColor, is the boundary color that should contain the flood fill or the color of the background you want to flood.
Device contexts (DCs)—not something you'd be familiar with from DOS—are Windows' way of expressing an artist's repertoire. Essentially, a DC is the easel that holds the canvas (a bitmap), with enough room for one each of a variety of tools (brush, pen, and font). VB gives you access to most of these options through control or form properties such as ForeColor, FillColor, BackColor, FillStyle, DrawWidth, DrawStyle, and DrawMode.
ExtFloodFill paints using the current brush selected into a DC. The FillColor and FillStyle properties determine the underlying DC's brush characteristics. The best way to write a generic Paint routine: Leave the canvas object in the same state you found it, other than the newly applied paint, of course. Do this by storing the canvas' FillColor and FillStyle property values before setting them as needed to paint, then restoring these properties to their previous values when you're done painting (see Listing 1).
The last issue: You must handle the coordinates passed to your custom Paint routine. You can safely assume they're in the same custom ScaleMode in effect on the canvas—this is a courtesy to the calling code as it's not required to perform any conversions. You can use your canvas' ScaleX and ScaleY methods to convert the passed coordinates to pixels for use with ExtFloodFill.
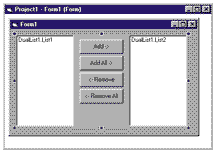
Q Reverse the Loop
I need to offer my users the ability to move items back and forth between two lists. I'm running into trouble, though, because every time I remove an item from the From list, the loop gets all horsed up when I look for the next selected item. What's the trick?
A Beginners, and even not-so-beginners, can trip themselves up occasionally on this sort of problem by not fully thinking through the consequences of their instructions. Consider this loop:
With List1
For i = 0 To .ListCount - 1
   .RemoveItem i
Next i
End With
Quick! How many items are in the list at the end of this loop? (You "old pros" in the crowd are thinking smugly, "half the beginning list count," right? Well, you're wrong, too. <g>) The code removes the first item on the first loop. This deletion shifts the list contents so the item previously second is now first, the previously third becomes second, and so on. Given this shift, the second loop removes the item originally third, the third loop removes the item originally fifth, and so on until you ultimately pop an error for looping past the end of the list. Reversing the loop avoids all these issues:
With List1
For i = .ListCount - 1 To 0 Step -1
   .RemoveItem i
Next i
End With
Always operating on the first ListItem rather than the loop-indexed item is another strategy that works just as well:
With List1
Do While .ListCount
   .RemoveItem 0
Next i
End With
Of course, if you simply want to delete all the items in the list, you'd use the Clear method. These examples only show how to handle an ordered list or collection properly. You can apply the same logic to unloading all the forms at application shutdown.
If you want to offer a "move all" option between lists in your case, you could use either of the previous functional loops to copy the ListItem first before deleting it. The only difference between the two: If you use the For loop rather than the Do loop, the To list shows the items in the reverse order of their original presentation in the From list.
If you're only moving selected items between lists, first loop from beginning to end, copying each item as needed. Then loop from end to beginning, removing each of the copied items. This dual-loop approach preserves the original item order (see Listing 2).
Download the sample DualList program (see Figure 2).
Q Reduce Flicker
I use this line to update a textbox with new information constantly:
Text1.Text = Text1.Text & strNewLine
However, this technique causes screen flickering because I reload the textbox every time. I even call LockWindowUpdate to reduce flicker, but that doesn't seem to help. Can you simply add lines to the textbox without using this line of code, the way the ListBox control allows you to use AddItem?
A The ability to replace only the selected text with new content is not a well understood attribute of the TextBox control. It's one of those forehead-slapping, why-didn't-I-think-of-that things. Strange as it might seem the first time you realize it, the SelText property isn't read-only! This leads to a simple solution to your problem:
With Text1
   .SelStart = Len(.Text)
   .SelText = strNewLine
End With
You could wrap this into a generic function easily if you're working with multiple textboxes in one app. I recommend adding a mandatory parameter indicating which textbox the text should be appended to and an optional parameter (that defaults to True) indicating if vbCrLf should be appended to the end of the passed string.
Karl E. Peterson is a GIS analyst with a regional transportation-planning agency and serves as a member of VBPJ's Technical Review and Editorial Advisory boards. Online, he's a Microsoft MVP and a section leader on several VBPJ forums. Find more of Karl's VB samples at
www.mvps.org/vb.
|